Some of the most authentic assessments come after students have been introduced to concepts then asked to apply that knowledge through building working models. This project is part of an integrated physical and life sciences unit on levers in the body. In the span of a few weeks, seventh grade students are asked to design and build a device that will allow them to pick up two weights of different sizes and mass, as well as a small thin object. Brian Ravizza is a place-based science instructor for 7th and 8th graders, preferring to take students into the natural spaces on and around his campus to learn science and activism, but he also takes time to do engineering projects that would fall into the category of biomimicry. In 2011, Ravizza was looking for a form of applied assessment to compliment his biology unit on the skeletal-muscular system.
In the days leading up to this project students dissect fresh chicken wings to notice how ligaments, tendons and muscles attach and work together in a wing. As a musician, Ravizza looks at anatomy from an artistic lens, “I wanted students to gain a literacy in how things worked, but I also wanted them to have an appreciation for the sculpture of structures and how that relates to their function.” After dissecting chicken wings and discussing how levers work, Ravizza’ students engage in a two to three week bioengineering project where students design, build then put to the test an artificial limb that can manipulate objects of varying size and mass.
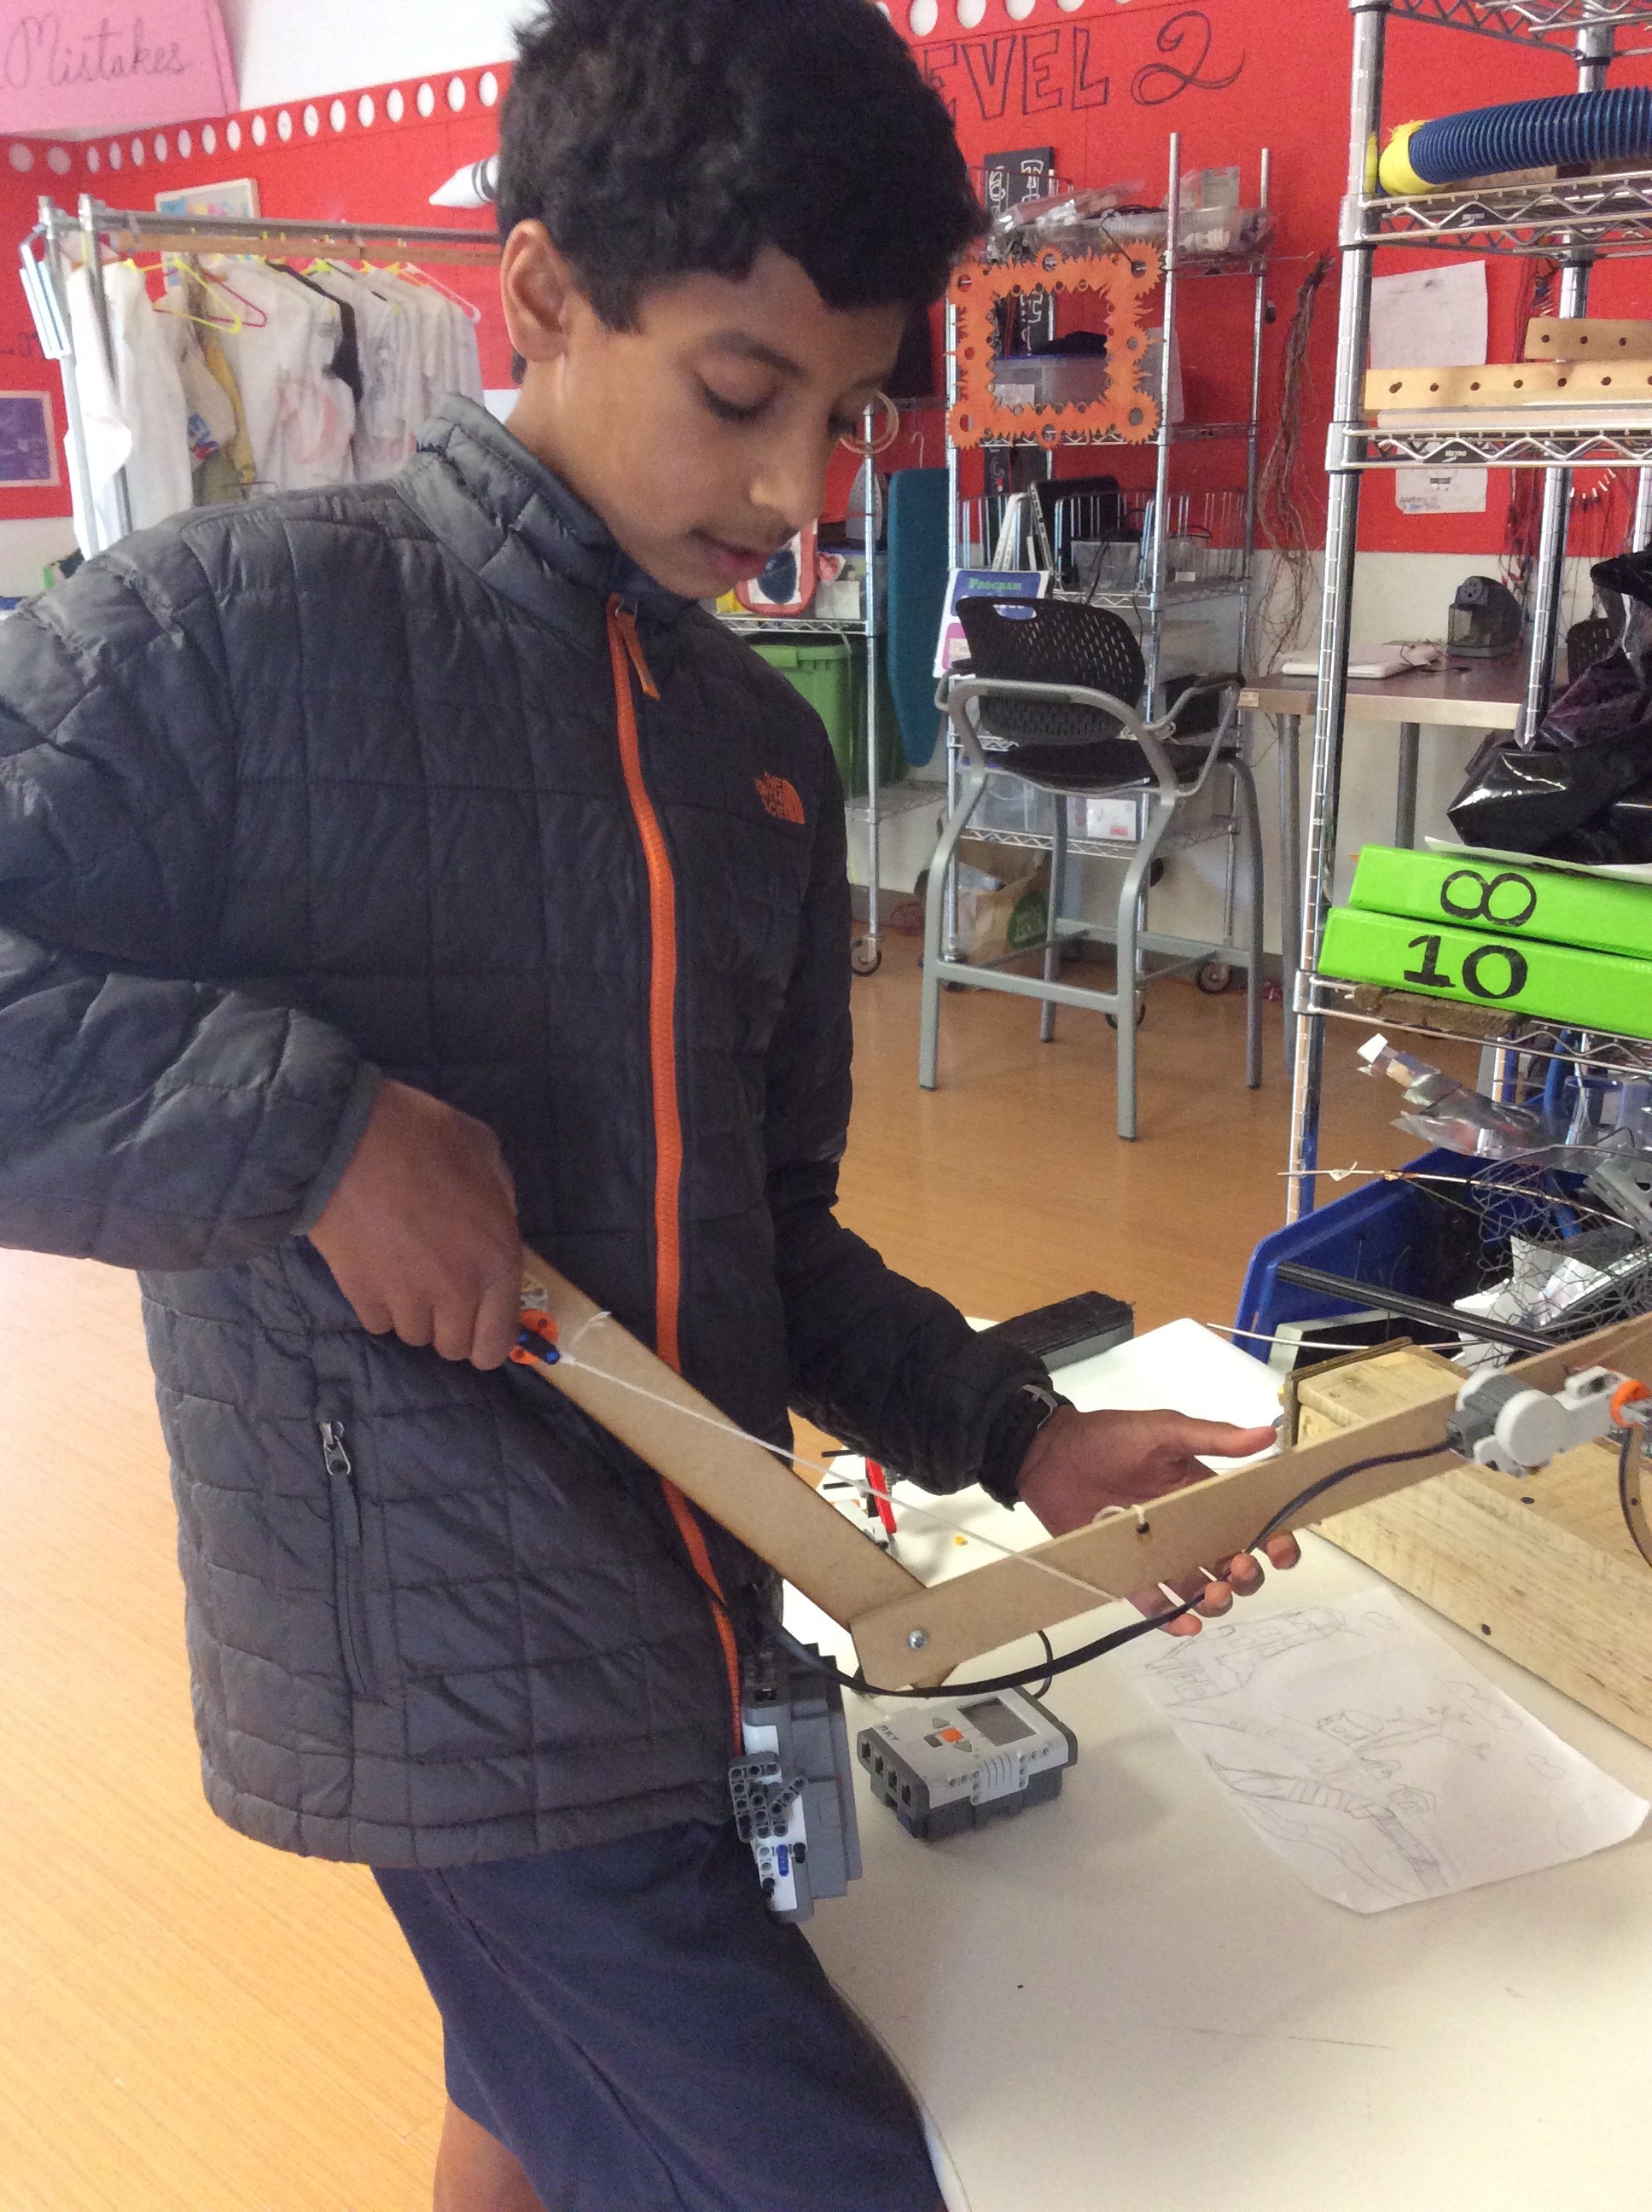
The first year Ravizza tried this project, students could chose to make a hand-like object or a moving arm joint. His goal was to have students make a working model with a third class lever that emulated the moving parts of a real arm. To test their designs students needed to lift a weighted object up and down without just scooping it up. Ravizza soon learned that he needed to hone his prompt for the challenge to make it more challenging. “Some students were able to solve the “problem” quickly. To meet the needs of individual students I challenged them to use a spring scale and reduce the amount of force needed to move their limb down to less than two newtons.” With each consecutive year of trying this project Ravizza has iterated on the expectations of the designed objects. Today student designs must pick up three objects, a soup can with a 200 gram weight inside, the 200 gram weight alone, and a short skinny straw.
In a few years the project evolved in several ways. Now that students are more familiar with the tools of the school’s makerspace, some projects incorporate laser cut pieces, 3D-printed pieces and in some cases, simple programming tools to move the limbs. Students have also been able to see how their work applies to the real world through a series of unique opportunities. The first opportunity came when a real artificial limb designer visited the school to discuss her work. After her talk she met with the young designers and gave feedback to final designs. The second opportunity came through a former faculty member whose daughter had been born with missing digits in her left hand. The faculty’s daughter was a kindergartener who dreamed of being able to use the monkey bars just like her peers. Ravizza’s students found themselves working with an organization called Enabling the Future (http://enablingthefuture.org/) that helps people 3D-print hands for children. Ravizza’s students were able to use the organization’s online and open source tools to help one of their own community members. When two seventh students realized the designs available online would not help the girl safely hang from the monkey bars they spent the rest of their project time designing an apparatus that could. “It wasn’t exactly true to the project parameters,” says Ravizza, “but it was a real need and it was real life. The girls designing the new solution were super motivated.”
Assessment for this project came in the form of careful documentation of the design process. Each day students kept individual notebooks recording how their design faired testing, what materials they used and why. Notebooks also kept detailed sketches with true measurements, offering another view into student understanding. Other forms of assessment came when students shared their work in front of the class in a final and dramatic test of their designs, along with a verbal explanation of how their design modeled a real arm or why it did not.
Recent Comments